I have been asked several times how I make my doll shoes. So, I decided to make a tutorial on how I make my doll sandals. Have you wanted to make a pair of doll sandals but are afraid? Have you tried and they ended up in the trash? I can answer Yes to both of those questions. I was afraid once....and I have messed up on shoes before and I am sure I will again, but that doesn't stop me from trying. My husband helps me cut out of foam/wood/pellon/bristol wood - thick cardboard for me. He actually come up with the idea to use bristol board and pellon. Several people have said that when the 5 - 6mm foam they cannot cut around the foam smooth.
Here are several doll sandals we made last summer.
I like for my doll outfits to have matching/coordinating shoes. Here is an outfit I made and had the shoes to match/coordinate.
So here is my tutorial on making 18 inch doll sandals for American Girl doll or Generation doll. Journey dolls feet are smaller than American Girl doll or Generation dolls. Below are the ones I made for this tutorial.
Supplies for making doll sandals. Template for shoes, 5mm foam, bristol board, pellon, ribbon, foam glue, and pony tail holder.
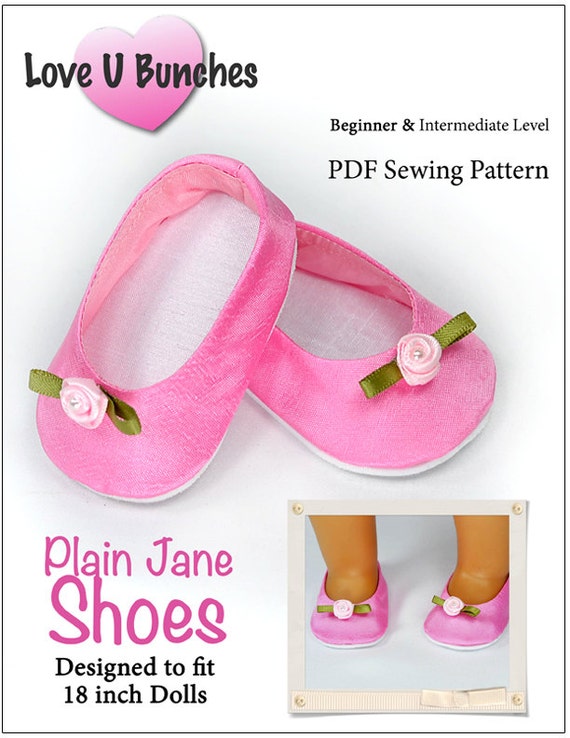
You can trace around your dolls foot to make a pattern/template, you can use a store bought sole for making a template, use a commercial pattern such as McCalls or Simplicity sole from a shoe pattern or you can purchase a shoe pattern online from several wonderful designers such as Love U Bunches, Miches Designs, Eden Ava Courture, Liberty Jane, or you can dowload free templates from Pinterest - if you do make sure it does fit your dolls foot.
Tip for cutting thick foam for shoes.
The technique for cutting foam: Use your shoe template and cut out another template using thick cardboard or Bristol board (sold at Hobby Lobby where poster board is sold - 3.99 or Micheal's in the drawing/art section) using scissors. The Bristol board comes in white and black. (We use the Bristol board in shoes instead of cardboard - provides more of a firm foundation and helps doll stand up too) Lay the cardboard template onto the foam, trace around it. Use a sharp X-acto knife - curve blade # 10...not the pointed one. We use a kitchen cutting board to cut out the foam. You will then cut around template - do this 3 or four times.This should allow you to get clean smooth edge.


I read a foam tip from My Froggy Stuff - If you have any roughness or uneven edges can use finger nail file to smooth out the foam. We have not had to this but just in case yours is not as smooth as you would like - lightly file around the edges. The file she used looks like a stick of butter - really. It is a block comes in different colors including yellow. You can find these at Sally's.
Cutting Bristol Board:
Take your shoe template and trace right and left sides onto Bristol board. Use scissors to cut Bristol board.
Cutting Pellon:
We also use pellon (AKA thick felt) - I buy mine at Hobby Lobby and it is sold next to felt squares in the craft section. He uses the bristol board template to cut out the pellon. When cutting white pellon we use black bristol board and when cutting black pellon we use white bristol board template to help with seeing where to cut. He uses a stencil burning (purchased years ago when he was cutting out stencils for airbrushing - purchased from an airbrush company. When using stencil burning, we use a square tile to burn/cut the pellon out. I use pellon under dolls foot - the foam can be easily indented especially with long fingernails. The pellon add's stability and protects the foam and with the color choices it coordinates the shoe.
Attaching Bead to pony tail holder - if pony tail holder has metal clamp keep in the center back of shoe. You do not have to add a pony bead. I didn't in all of my shoes.
Cutting Ribbon:
Cut four pieces of ribbon 3 3/4 inches - two for each doll sandal.
Assemble Sandal:
Take white pellon and glue to black bristol board. Then place one of the ribbons at top of sandal glue underneath bring under one inch of ribbon on each side.
I really like this glue. It dries clear and all the shoes I have made have held up - none have come apart.
Take second piece of ribbon fold in half, place the metal piece of the pony tail hold in the center. Fold under 1 inch of ribbon and glue and then fold over the remaining ribbon and glue it to bristol board.
Place a generous amount of glue onto ribbon/black bristol board side and now take your 5mm foam that you cut out. Then we take two pieces of wooden templates - place one on top ( slide under the ribbon just like the dolls foot would be) and and one on the bottom, squeeze the top and bottom wiping off any glue that oozes out with a damp paper towel or baby wipe. Place a rubber band around.
This serves as a clamp. If you cannot cut out a wooden template ( made from 1/4 inch Birch veneer wood - bought at Lowes) - used band saw to cut out using shoe template) you can cut out bristol board and use it as a clamp. This method of clamps prevents the rubber band from digging into the foam. Wipe off any glue that oozes out and do not let glue get on to rubber band. Use a baby wipe or damp paper towel to remove glue. Let dry.
Decorative Trim:
You can use a variety of ribbon, jute, elastic, shoe laces, and other decorative trims for the sides of shoes. Take your trim and lay around entire shoe and slightly overlap in the back - cut. Take your foam glue and glue down the trim. Glue in the seem that way you are not getting all over the foam and press trim with your finger tips. Add extra glue where the two joins together in back. Press firmly with fingertips around ribbon - let dry If your trim wants to unravel where you cut it you can use Fray Check on each end to prevent it from coming undone. If you are using trim with a decorative pattern as we did in the sandal tutorial - make sure that your run the opposite direction on the other shoe so that they will match.
Here is the finished doll sandals
Other Tips/Options for making doll shoes:
Decorative Trim options
Here are just a few of the trims I have (I actually have several totes) of ribbon, jute/hemp, rope, braided trim, braided elastic, shoe strings to use around the edge of your shoes. I prefer to buy the ribbon when it is 50% off at Hobby Lobby.
Here are some examples of vinyl, glitter canvas, and pony beads to use for other styles of shoes. The vinyl and glitter canvas can be found at Hobby Lobby next to the felt squares sold in the craft section. The best thing is the glitter does not come off of these sheets. The vinyl sheets would be great for doll boots. I have used these glitter sheets on embroidering granddaughters shirts and they can be washed and dried - it doesn't fall off. Great product.
Below are some T-Platform sandals I made using the vinyl using pattern from Miches Design sold on Pixie Faire.com This was my first time sewing on vinyl...as you can see my lines are not straight. I kept these for my granddaughters. I could never sell something - that isn't straight.
In photo below are some wooden sandals using store bought crochet trim. We used two 1/4 inch wooden templates glued the trim in between. Used elastic on back on ankle to keep sandal on dolls foot - elastic glued with trim at an angle on each side. Upper right hand are flip flops. Used black braided elastic for ankle strap.
Below are two patterns I recently used for doll shoes. Pink with white polka dot shoes are Miche's Design - Bow tie shoes and the nautical print is Love U Bunches Plain Jane shoes sold through Pixie Faire (formerly Liberty Jane Clothing)
I hope you have found this tutorial educational and inspirational. With anything in life don't give up on your first attempt. Keep trying until you master it or achieve what you want. As always, thank you for taking the time and reading my blog. Be sure to follow my blog to see more inspirational tutorials - coming soon matching headbands.
GiGi